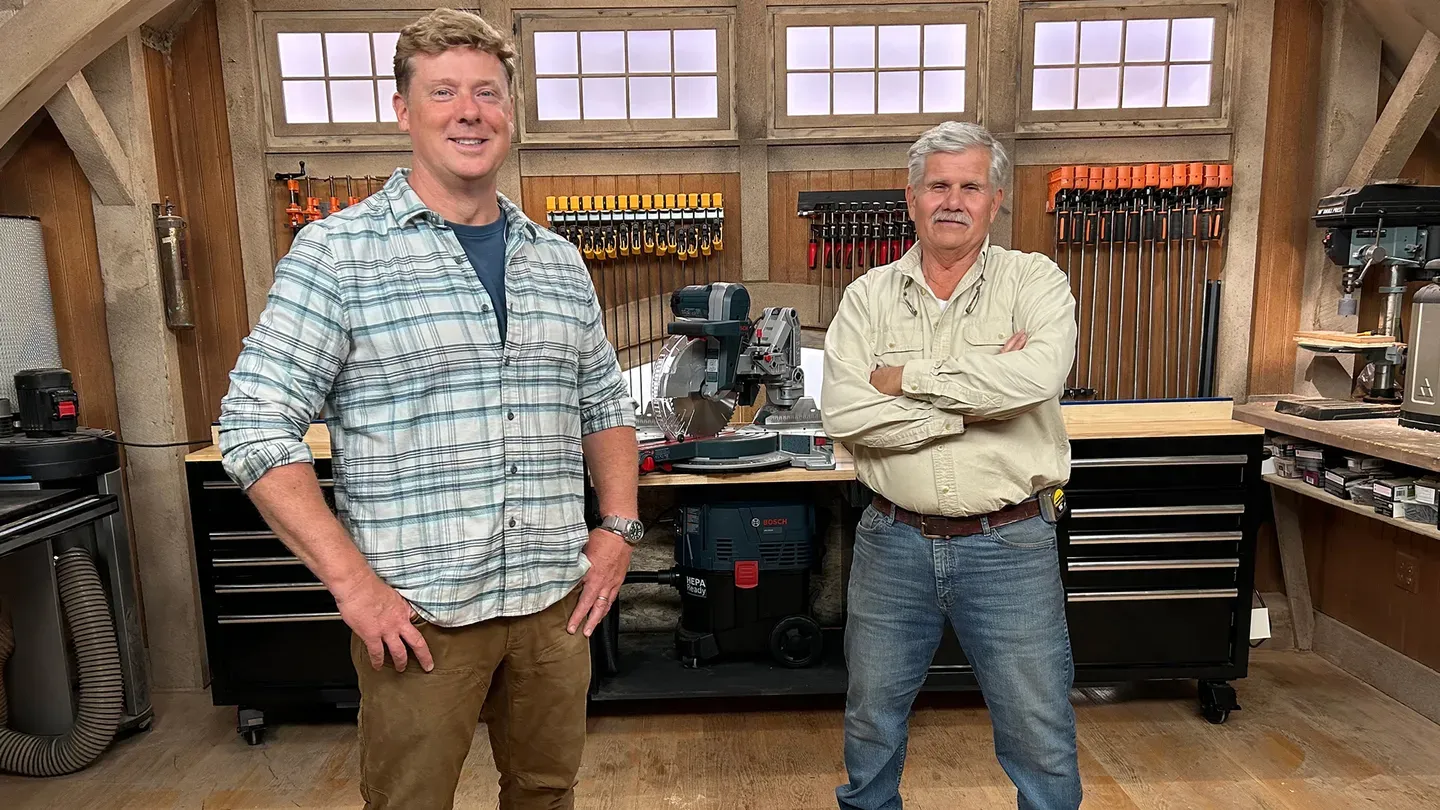
E8 | Winter Prep, Miter Saw Station | Ask This Old House
Season 22 Episode 8 | 23m 42sVideo has Closed Captions
Lee talks winter prep; Richard shows a water heater; Tom builds a miter saw station.
Lee Gilliam shares the key tools and products to include in a winter weather kit to prepare for winter; Mark McCullough shares his favorite homeowner-friendly masonry tools and how to use them for entry level projects; Tom Silva and Kevin O'Connor upgrade the workspace by building a new mobile miter saw station, featuring two work benches and cabinets for extra storage.
Problems with Closed Captions? Closed Captioning Feedback
Problems with Closed Captions? Closed Captioning Feedback
Funding for THIS OLD HOUSE is provided by The Home Depot and Renewal By Andersen.
Support provided by:

E8 | Winter Prep, Miter Saw Station | Ask This Old House
Season 22 Episode 8 | 23m 42sVideo has Closed Captions
Lee Gilliam shares the key tools and products to include in a winter weather kit to prepare for winter; Mark McCullough shares his favorite homeowner-friendly masonry tools and how to use them for entry level projects; Tom Silva and Kevin O'Connor upgrade the workspace by building a new mobile miter saw station, featuring two work benches and cabinets for extra storage.
Problems with Closed Captions? Closed Captioning Feedback
How to Watch Ask This Old House
Ask This Old House is available to stream on pbs.org and the free PBS App, available on iPhone, Apple TV, Android TV, Android smartphones, Amazon Fire TV, Amazon Fire Tablet, Roku, Samsung Smart TV, and Vizio.
Keep Exploring


This Old House Insider Newsletter
Get This Old House exclusive stories, tips, and behind-the-scenes information delivered right to your inbox every month.Providing Support for PBS.org
Learn Moreabout PBS online sponsorship♪♪ Kevin: On "Ask This Old House," our experts travel across the country to answer questions about your house.
♪♪ Today, Lee shares his snow removal tips to prepare for the coming winter.
Lee: I got magnesium chloride, which is much better for the environment and much better for the pets.
Kevin: Then Mark shares his list of go-to masonry tools.
Mark: You can see I've got a nice edge on it.
Kevin: And on "Build It," Tom is ready to upgrade the workspace by building a miter saw station.
Tom: Now we even got the wheels.
We can roll it back.
Kevin: That's all coming up next on "Ask This Old House."
♪♪ Hey, Lee.
Good to see you.
Lee: Good to see you, Kevin.
How are you?
Kevin: Alright.
Looks like you got winter on your mind.
Lee: Yes, we do.
I brought some materials to melt the snow.
Kevin: Gotcha.
So what are we looking at here?
Lee: We have straight salt.
Kevin: Okay.
Lee: You can get this pretty much anywhere.
Any DPW.
Really inexpensive, works really well.
Kevin: So you like the fact that you get it in bulk and it's not that expensive?
Lee: Correct.
Kevin: So you're using this -- what?
-- driveways?
Lee: Driveways, wells, parking lots, things like that.
Kevin: Gotcha.
Okay.
Moving up from there.
What do you got here?
Lee: I got some calcium chloride.
Kind of tough on plants and pets.
Kevin: Yeah.
Okay.
I have seen this put down.
And, like, you can watch it literally burn a hole through the snow and the ice.
It's powerful stuff.
Lee: Very powerful stuff.
Kevin: So -- But tough on the plants.
Tough on the pets.
Lee: Correct.
Kevin: How does this do with pets?
Lee: They don't like it, but it's salt.
They get salt in their own diet.
So there you go.
Kevin: Gotcha.
And the third one you got for us?
Lee: I got magnesium chloride.
Kevin: Magnesium chloride.
Lee: Which is much better for the environment and much better for the pets.
Kevin: Okay.
So this is the stuff that if you do have pets that are sensitive or shrubs nearby, and what surface are you putting this down on?
Lee: I would do my walkways as well as my driveways.
Any surface you need to.
Kevin: Gotcha.
Lee: Okay.
Kevin: Do you use just one or do you sort of mix and match?
Lee: I mix and match.
I'll use the salt mostly, and then we'll use this over here.
Kevin: Depending on surface and clients and all that?
Lee: Correct.
Kevin: And spraying.
What do you use with the spray bottle?
Lee: I have a spray here.
It's nonstick.
Kevin: Oh, look at that.
Lee: So what I like to do is we like to spray the machines as well as the outside as well as the inside, you know, augers and all, spray that.
Kevin: So that heavy, wet snow that tends to build up, this is going to help you prevent that?
Lee: Yes.
Kevin: It's going to slide right off or fly right off?
Lee: Exactly.
Kevin: Beautiful.
And is this the kind of thing that you would spray on a shovel as well?
Lee: Yes, I will.
I have some shovels over here.
Kevin: What'd you bring us?
Lee: I brought a smaller shovel, which is for speed.
Kevin: This is your go-to?
Lee: Yes, go-to shovel right there.
We spray that as well.
Kevin: So plastic scoop.
This is for moving, lifting, tossing, the whole deal.
Lee: Yes.
Kevin: Gotcha.
And you guys -- you guys use it a lot.
Lee: We use it a lot.
Kevin: Go-to one.
Alright.
Got it.
Lee: Alright.
Kevin: What else did you bring us?
Lee: And I brought a bigger one.
Kevin: What do you use for that?
Lee: This one's great for, like, pushing the driveway, you know, taking your time.
You know what I mean?
Just getting it done.
No heavy lifting.
You're not going to do the stairs with this.
You're going to do maybe a flat-surface driveway, things like that.
Kevin: Pushing it as opposed to sort of lifting it?
Lee: Correct.
Correct.
Kevin: Gotcha.
Okay.
So, shovels out of the way.
You brought us a snow blower?
Lee: Yes, I did.
Kevin: What do you got?
What do you have there?
Lee: This one here has the paddles, smaller machine.
It's a paddle.
Paddle ones here.
Here are the paddles.
Kevin: This is a paddle right here?
I've not worked with one of these.
So can I get underneath here?
Lee: Sure can.
Kevin: So this is going to spin.
That paddle is going to move the snow up and out through here?
Lee: Yep.
Kevin: So this is the leading edge that's going to scrape sideways?
Lee: Correct.
Kevin: Nice clean finish?
Lee: Nice clean finish on it.
Gets right down to the pavement.
Whatever you need.
Kevin: I've got the auger type, the big metal one.
Lee: Yes, very popular machine too.
But this one here is a paddle.
This dot here, on here tells us, Kevin, that it's worn out.
So it's time to change the paddle.
Kevin: So this is the leading edge that hits the ground.
And you're saying it's going to wear this way?
Lee: Yes.
Kevin: It gets to there, you're done.
Lee: Yes, exactly.
Kevin: Who changes that?
Lee: I would go to a small engine repair shop.
They'll be glad to do it for you.
Kevin: Sure they would.
Absolutely.
Okay.
So in terms of maintenance, this is -- Lee: Yes.
Kevin: This is gas-powered.
Right?
Lee: Yes, it is gas-powered.
So it has a spark plug.
I'm going to check the oil.
Kevin: Yeah.
Lee: Okay.
Kevin: Where's the oil?
Lee: Oil's back here.
Kevin: What are you looking for?
Lee: I want a nice gold color.
Kevin: So you want it clean?
Lee: Yes.
Nice and clean.
This is nice and clean, so I wouldn't bother with this.
Kevin: Okay.
And spark plug.
We've got a hatch up here.
Lee: There's a spark plug in here.
Kevin: You got it disconnected, which is why I can put my hands down there.
What are you thinking about in terms of spark plugs?
Lee: Okay, this one here has a little bit of a carbon buildup, so I would probably replace this.
Kevin: The carbon being this black discoloration right there.
Lee: Yes, around the spark plug itself.
Kevin: Generally speaking, you get how long?
Lee: You probably get about a season out of a spark plug.
Kevin: Gotcha.
Lee: Okay?
Maybe two seasons out of changing the oil, but a season at least out of the spark plug.
Kevin: Not bad.
Pretty easy to actually maintain.
Lee: Yep.
Kevin: Nice to have them working when the snow comes.
Lee: Correct.
Exactly.
Kevin: So moving snow and salt, all different variations.
Lee: Mm-hmm.
Kevin: It looks like you're ready to go.
Lee: Ready to go.
Kevin: Alright.
Lee: Alright.
Kevin: Thank you.
I'll see you early.
The first driveway done.
Lee: Always.
Kevin: Good man.
Lee: Alright.
Richard: I got a call the other day about a homeowner running out of hot water and we came and found this relic, this sort of unicorn.
This is a copper water heater.
Most water heaters are made out of glass-lined steel.
And this was a company called Trageser Custom Copper.
And this tank has been here a long time.
If you look down at the rating plate, you can see that it was made at John F. Kennedy Airport, IDL, not JFK Airport.
Well, John F. Kennedy Airport became the airport in '63.
It used to be called Idlewild.
For this plate to have the new name but the old airport code of IDL, it would have to have been made in the '60s.
So this water heater could be 60-something years old.
A lot of things last 60 years and do fine.
Most water heaters don't.
Most water heaters will last about eight years.
This has been about 60 years now.
Now, what's happened over those 60 years, lime, scale, calcium, magnesium has settled probably down into the bottom of this tank right here.
So it's actually acting like a insulation blanket between the burner and the tank filled with water.
I'm not sure if I know any plumber that will be brave enough to get inside there and try to flush it out because the risk of it leaking would be too great.
So sadly, I think even though the tank shouldn't leak, I think it's time for the homeowner, sadly, to have to say goodbye to this and find an alternative.
Now, it might be -- Nowadays, it might be an instantaneous gas-fired unit right here, or it could be another tank type water unit.
You know, people often say to me, "Well, how come they don't make a water heater that lasts?"
This company, Trageser, made a water heater that lasted -- what?
-- 60 years.
And guess what.
They're out of business.
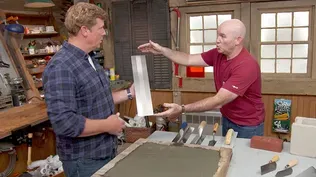
♪♪ Kevin: Hey, Mark.
Mark: Hey, Kevin.
Kevin: Wow.
You emptied your tool bag for us.
I like it.
Mark: I did.
So I put together a little kit for a homeowner.
Kevin: Everything a mason needs.
Mark: Everything they would need for small jobs at their house is right in front of us.
Kevin: What do you got?
Mark: So start with you need a tape.
Obviously, you're going to need to measure stuff.
That's what the tape is for.
This nice bright line right here is going to help us get a straight line from A to B.
We'll just go from -- Kevin: Pull it tight and just lay right up to it?
Mark: That's it.
This is what we call a torpedo level.
It's nothing that I would use.
I use a two-foot level and a four-foot level.
But for a homeowner, a torpedo level is perfect.
Kevin: Gotcha.
Alright.
I see your brick hammer there, well worn.
Mark: Well worn.
This is my own brick hammer right here.
And you can see I got a nice edge on it.
So if I have to cut a brick or a stone.
Kevin: It is impressive to see someone cut a straight line with a blunt tool.
Mark: Yep, a lot of practice, but it happens.
We have a variety of chisels.
They're different sizes because we have different masonry joints that we might have to extract from, say, a stone wall.
They vary quite a bit.
Kevin: Right.
And the big boy.
Mark: The big boy right there.
So if you're going to do any chopping into cement or even a brick mortar joint, that's going to be the guy.
This orange protector right there is going to stop you from getting hurt if you do miss.
Kevin: Gonna come in handy more than once, right.
Mark: That's right.
Kevin: So we're talking mostly demo and clean up there.
And then we've got application here?
Mark: That's right.
This is what we call a finish trowel.
So if you had to repair any of your concrete work around the house, a patio or a walkway after you got the cement in, you'd smooth it off with this guy.
Kevin: Okay.
Mark: This right here, of course, you know that is your brick trowel.
So if we were doing a step repair or even a stone wall repair, this is our tool.
This is a 10-inch trowel.
That's very typical of what even a mason would use.
This trowel, again, you can see it's much smaller, but you can see that angle in there, that's going to allow us to get into all the nooks and crannies that we need to.
Kevin: Right.
Mark: This right here is called a margin trowel.
Again, some of the stone joints that we are going to be taking out and putting back are wide.
So that tool will come in handy.
Kevin: So we've seen you use them by themselves, but then we've also seen you use them in combination, two tools as one.
Mark: That's right.
Kevin: Fill it up with mortar, push it in with the -- well, push it into the joints.
Mark: Yep.
Kevin: Jointer.
Right?
Mark: So this is a jointer, very simply and again, you've seen me do it a million times.
I'll go in and I'll fill the joints.
But this edge right here is also what we call a slicker.
So the final pass that we make on that mortar joint is going to be slicked.
That's going to protect it from the water and the rain.
Kevin: Seal it up.
Mark: Seal it up nice.
Kevin: Cleanup?
Mark: Cleanup.
This is -- This is a harder bristle right there.
So got to clean up the floor.
That's what I'm going to want to use.
Kevin: It is softer.
Mark: But that soft brush right there, that's what I'm going to use on my final brickwork.
I'm going to brush that work down.
That's why I want the soft bristle.
Kevin: Wipe off the -- you guys call them the -- What do you guys call them?
Mark: We call them snots.
Kevin: Right.
Wipe off the snots.
Mark: Yeah.
Yeah.
Always love to say it.
Yeah.
Kevin: Love it.
More cleanup, obviously.
Mark: More cleanup.
My favorite tool, the sponge.
Everything looks neat and clean when you're done.
Kevin: Gotcha.
Mark: Yep.
These rubber mallets right here, they're perfect for brick walkways that are based in sand.
Sometimes they settle, so we'll pick the brick up.
We'll put down more sand, tap, tap, tap with a rubber mallet.
That way we don't damage the brick.
Right.
Kevin: And then -- Oh, my goodness.
Mark: So this is literally a baker's tool, but this is what guys are using today.
And it's very easy for a homeowner to use.
Instead of you and I taking these tools to joint up a wall, all you do is dump the mortar into that bag and you use it just like a baker.
Kevin: So it's a pastry bag.
Mark: It's a pastry bag.
Kevin: I've literally seen it used before.
I mean, we did this down in Carolina.
Mark: Yeah.
Kevin: Guys were just squeezing it into all of the joints.
Mark: That's right.
Kevin: It was remarkable.
Mark: Super time saver.
Kevin: Do you consider it cheating?
I mean, you're old school.
Mark: So a little bit old school but I'll tell you what -- I'm kind of into it.
Kevin: You are?
Mark: Yep.
Kevin: You've got one in your bag.
Mark: The speed is just incredible.
So more efficiency.
Kevin: You're evolving.
Mark: Got to go with it.
Yes.
Evolving.
Kevin: Alright.
Speaking of old school, I don't see you use this very often.
Mark: Yeah, you're right again.
Not a huge glove guy.
I like to feel the material as I go along.
But these gloves, you can see they're form-fitting.
That's rubber right there.
So easy grip, but it forms around the hand, you know, tightly.
And the guys seem to really get along with it.
Kevin: Eye protection obviously, metal hammers on stone, you don't want anything flying back at you, and a lot of dust.
Mark: A lot of dust so protect yourself.
These three items are going to do that.
That's going to protect you from the dust.
This is going to protect the eyes.
And then, of course, the gloves.
Kevin: Dust from cutting, but also from mixing.
Mark: Right.
Kevin: And I've never seen you on a job site without one or six of these.
Mark: Okay.
So more evolution in our business.
I used to have to put the sand, then add the mortar, then mix that all together, add water.
Then I had my product.
Right now, as you know, everything is pre-mixed in a bag, dump it into the tub, add water and you're good to go.
Kevin: Makes it nice and simple.
Okay, so if a guy like me were to wanting to do some projects around the house, if I bought what's on this table and around me, have I got what I need for the basic projects?
Mark: Definitely.
Everything right here is going to get you good to go.
You can do anything.
Kevin: Cool.
Alright.
Well, good information.
Thank you.
Mark: You got it, Kevin.
Kevin: How am I doing?
Up here.
Okay?
Mark: No, you look great.
That's my acid brush though.
Kevin: Ooh.
Mark: Check your lip.
It's gone.
Kevin: [ Laughs ] ♪♪ Whoa, Tommy.
New tool, new storage.
What are you up to?
Tom: Well, actually, I think it's time we changed the area where we do our mitering and cutoff because that area is too small.
Everybody throws stuff in there.
It's always in the way.
We got to clean it out.
Kevin: Tell us what you really think about it.
Alright.
Tom: So what I want to do is I want to make the cutoff station right back here.
Kevin: Oh, use the whole length.
Tom: Alright?
Because all we have is our clamps here.
We got plenty of room.
So I thought if we started with two off-the-shelf cabinets like these.
Kevin: Lots of storage.
Tom: Alright.
We take the cabinets and we can spread them apart.
Kevin: Lots of drawers.
Butcher block top.
Tom: Separate them enough so that we can get the width of the saw in between the cabinets and drop a shelf down the height of the bed off of the tabletop here and everything will be at the same level.
Kevin: Nice, long workspace right here.
Very nice.
Tom: So the first thing we need to do is lock these two cabinets together so they can be in position here.
But when we need to, we can roll the whole thing out as a unit, tilt it for something long, or roll it out of here and get it out of the way.
Kevin: Bigger and better.
Alright.
I like the improvements.
Tom: Alright.
We got to get the saw out of the way to get started.
Kevin: [ Grunting ] Ooh, boy.
Got it.
Tom: That's a heavy saw.
Alright.
I'm going to use this piece of 3/4-inch plywood to screw underneath the cabinet to lock them together.
But we have to allow for the wheels.
So we're going to cut out four sections for the four wheels.
[ Saw buzzing ] So, we've cut the slots for the wheels.
We've drawn a line where the side of each cabinet is going to go.
Now we're going to just put a temporary spacer in here so that when we screw the bottom to the cabinet, this will hold the space between the two cabinets equal.
[ Drill whirring ] [ Grunts ] Now, these are self-drilling, self-tapping screws go right into the metal cabinet.
Nice.
Nice.
Coming as one now.
So far, it's working just fine.
Kevin: [ Grunts ] Yeah.
Tom: Ready?
Down, down, down.
Kevin: Clear.
Tom: So, here's the piece for the back.
Kevin: So, same idea, Tommy?
Put one on the back to make it nice and stiff?
Tom: Right.
It'll stiffen it but it'll also really form a cabinet so we can put the vacuum in underneath.
You took the cleat off the bottom there, and then I took it and put it on the back right here.
And this is actually going to go on the top.
So when we flip it over, the spacing on the cabinets will be equal on the top and the bottom.
We'll put the cleat tight against the cabinet.
Kevin: Same idea.
Self-tapping screws into the back of the cabinet?
Tom: Yep.
[ Drill whirring ] Kevin: Two, three.
Tom: Look at that.
Kevin: Not bad at all.
I think I carried all the weight, but it was nice having you.
Tom: Yeah, well, you do seem to have a little more weight.
Kevin: Oh!
Tom: Okay.
Now we're ready to install the shelf that the saw is going to rest on.
But that, as I said earlier, is going to rest down lower so the top of the saw is basically flush with the top of the cabinets.
Now, we could use plywood that we used on the back and the bottom, or we could use some scrap wood over the other side of the room.
But I thought we'd use this like a butcher block top that they sell for these cabinets and I thought it would look nice, blend it right in, nice even line.
But the problem is, is we have to figure out a way to mount this to the cabinet.
Kevin: What are you thinking?
Tom: I'm thinking some wooden cleats.
We can use one on each side and then maybe one across the back.
Kevin: Okay.
Tom: We also have to think about how we're going to attach the wood to the metal.
Now, we used self-tapping screws for the plywood, which we could use the same for the two-bys, but they'd have to be much longer.
Another way we could do it is drill some holes through the two-bys into the cabinets and use some nuts, bolts and washers.
Kevin: Right.
Tom: Problem with this is the cleat is going to almost line up with all this hardware in the cabinet, like all the drawer runners and there's some other stuff going in there.
We got to be able to reach our hand in there to put the nuts and washers in.
And I definitely don't want to drill a hole or damage the runners at all.
So I want to use this little thing right here.
This is a threaded riveted insert.
There's threads on the inside that will match the threads of the bolts that we want to use.
And they screw right on there like that.
Alright.
So we put four temporary legs here to hold our cleat at the right height so we can pre-drill some holes.
[ Drill whirring, metal clanking ] Kevin: Yep.
What is this magical piece of equipment?
Tom: Works just like a rivet gun.
The only difference is that instead of a standard rivet, this is a threaded part that you screw the threaded insert rivet into.
You screw it in like that.
You see this part of the knurled part of the rivet head right there.
When I pull this together, watch that compress.
See it?
Kevin: Oh, yeah.
And so the metal of the cabinet will be between the front and that bulge that's happening?
Tom: Exactly.
So I keep pulling it.
Kevin: Ohh.
Tom: See there?
See that?
That holds the rivet head that's threaded on the inside onto the cabinet.
Kevin: Mm-hmm.
♪♪ Tom: There you go.
♪♪ Alright.
Let's slide it in there.
♪♪ Whoa.
♪♪ ♪♪ ♪♪ So, we'll drill a couple of holes through the cleats in the front to hold the front down.
And we also need to drill a couple of holes, one for the vacuum hose and one for the cords.
♪♪ Alright.
So we get three screws that are going to go in the back and I got two screws that I'm going to drive up into the front.
♪♪ Beautiful.
Alright.
So now we have a couple of flat tables on each side of the saw, but lots of times when you're using a miter saw or a chop saw, you want a fence extension on each side to put your material against.
Sometimes you want to make sure it's true with the saw.
So if we use some 1x3 right here and hold it up, line it up and attach it to the table, that's good.
And there's all kinds of ways we can do it.
But I really don't want to screw it down because I like the fact that we have a nice table to work with when we need it.
Kevin: You don't screw it down though, it's going to move all over the place.
Tom: Well, we could use a biscuit like this, put some slots in the table, but a biscuit like I have a couple of slots here, this biscuit here, and that slot there lines up, but it's not very strong.
Kevin: Right.
And so that's just a slot on the top part.
And you put a slot which is in the table right there?
Tom: Yep.
And biscuits are great for lining things up.
But this biscuit right here is two parts and it's a different slot and you just drop that in.
Right?
Now that's flush.
Kevin: I like that.
Tom: Alright.
Now I have another one that goes on this side.
Slide it in.
Okay.
Now I have -- Everything is lined up.
I take this, line up the two pieces and a little...tap.
Kevin: Well, that's not going anywhere.
Tom: That's not going anywhere.
Kevin: But you're saying you can take that out?
Tom: I can take it out.
Kevin: Oh, yes.
Tom: And now I have my flat top again.
[ Saw buzzing ] Ready?
Kevin: Wait a second, huh?
Not going anywhere.
Unless... Tom: Unless you pull it off.
Kevin: You want it to?
Tom: Yeah.
Now we have a nice flat surface again.
Alright.
We mounted this aluminum track right on top of the fence right here.
And in the top of this metal channel, there is actually a recess that we can attach this tape right into it, and it will sit flush with the top edges of the groove.
It sticks down.
We have to line it up with the saw to calibrate where it needs to go.
And then we have this piece here that will mount on top of the track, slide back and forth to any measurement that we want.
We stop it, lock it in, take our pieces, put it right up against it, and every piece will be exact every time we cut it.
Kevin: I love it.
Tom: Alright.
So I painted up all the exposed wood black, so it blends right in.
Kevin: Beautiful.
We got the fence, we got the tape, We got the stops.
Awesome.
Tom: We got it all.
Now we even got the wheels.
We can roll it back.
Kevin: Rolls as one big piece.
Let me just plug it in.
So this will give us power to the entire cabinet as well as the saw and vac.
Tom: Keep it clean too.
Kevin: Look at that, Tommy.
We finally have ourselves a proper miter station, and look at all the storage.
Tom: A lot of storage.
Now all we got to do is find somebody to organize all this stuff that we got.
Kevin: Very nice.
Alright, well, that project is done, but we've got more coming up next time.
So until then, I'm Kevin O'Connor.
Tom: I'm Tom Silva.
Kevin: For "Ask This Old House."
Someone to organize it?
Tom: Not me.
Kevin: Next time on "Ask This Old House"... Heath shares what generator options are out there and how to make the best selection for your home.
Then ready to open this can of worms?
Jenn shares the benefits of worm farms and how to create one at home.
Plus, Mauro heads to Tulsa to help a homeowner paint her original front door.
All that on "Ask This Old House."


Support for PBS provided by:
Funding for THIS OLD HOUSE is provided by The Home Depot and Renewal By Andersen.